Mixing different flooring materials—like hardwood and tile or carpet and vinyl—can add style and function to your space. However, making the transition between flooring types smooth and visually appealing is key to a cohesive design.
In this guide, we’ll explore the best ways to transition between different floors, from transition strips to blending techniques, to help you create a polished, professional look.
Why Flooring Transitions Matter
A well-planned flooring transition:
✅ Creates a seamless flow between rooms
✅ Prevents tripping hazards
✅ Allows different flooring materials to function at their best
✅ Enhances the overall aesthetic of your space
Whether you're transitioning between different heights, materials, or patterns, here’s how to do it the right way!
1. Using Transition Strips
🔹 Best For: Connecting hard surface floors like tile, hardwood, and vinyl.
🔹 How It Works: Transition strips are metal, wood, or vinyl pieces that bridge the gap between different flooring materials.
🔹 Options Include:
✔ T-Molding – Best for floors of equal height, like hardwood to laminate.
✔ Reducer Strips – Gradually slope between different thicknesses (e.g., tile to vinyl).
✔ Threshold Strips – Perfect for high-traffic doorways and entryways.
💡 Pro Tip: Choose a transition strip in a similar color or finish to your floors for a seamless look!

2. Flush Transitions for a Clean Look
🔹 Best For: Open-concept spaces and luxury designs.
🔹 How It Works: Carefully cutting and laying two flooring types side by side with minimal separation.
🔹 Ideal Pairings:
✔ Large-format tile and hardwood
✔ Concrete and wood-look planks
✔ Matching grout or caulk for a nearly invisible transition
💡 Pro Tip: A flush transition works best with materials of similar height!

Photo Credit: ProductsDirect.com
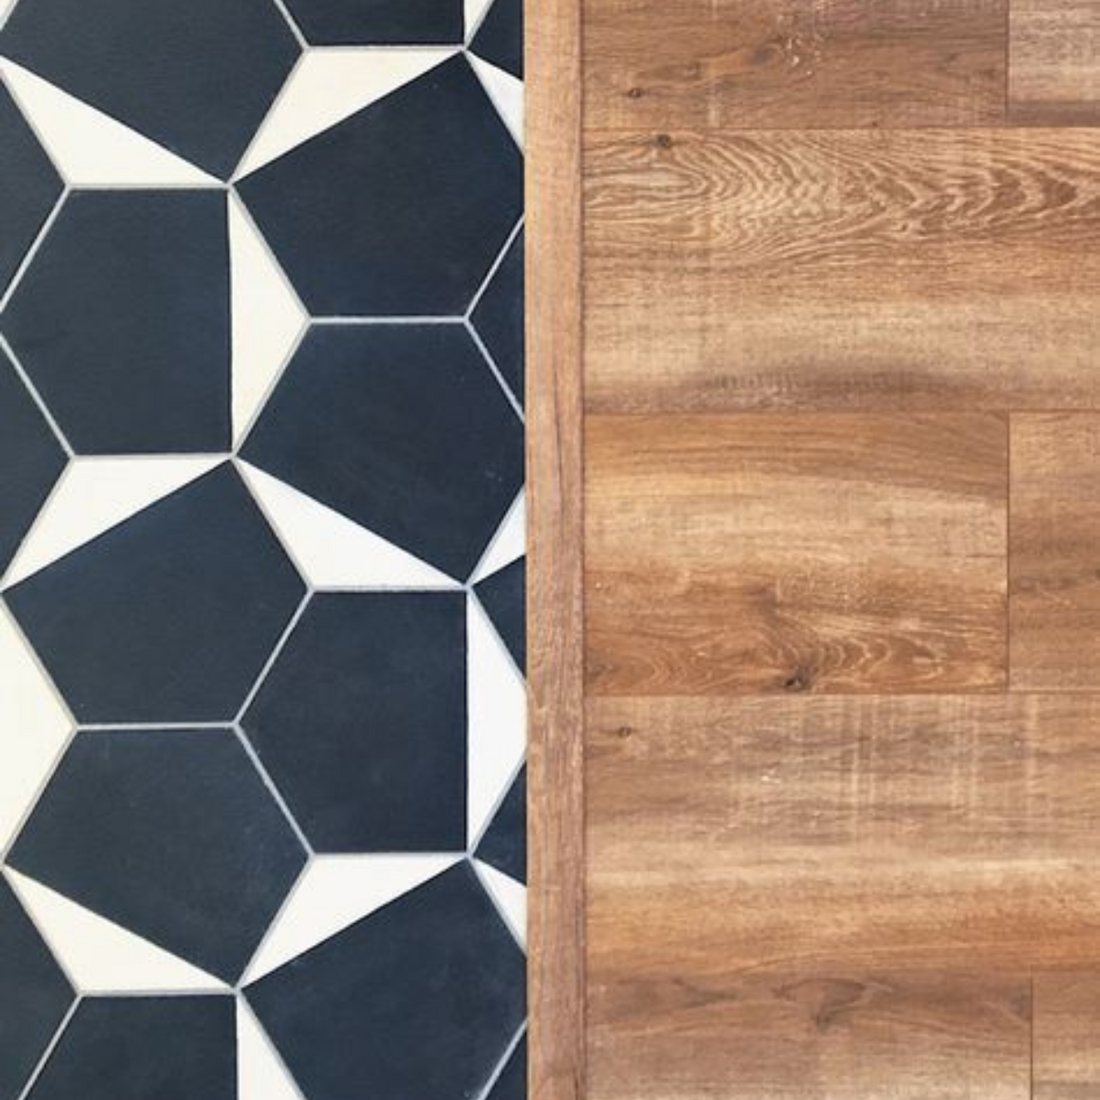
3. Blending Flooring with a Border
🔹 Best For: Defining spaces within an open floor plan.
🔹 How It Works: Use a border of tile, wood, or stone to transition between flooring types.
🔹 Great for:
✔ Separating kitchens from living spaces
✔ Creating a focal point in entryways
✔ Making mixed-material designs look intentional
💡 Pro Tip: A border can be a contrasting or matching material—both work beautifully!
![]()
Photo Credit: Corner Stone Remodeling
4. Using Patterns for a Natural Flow
🔹 Best For: Unique, high-end designs.
🔹 How It Works: Instead of a straight-cut transition, blend materials with a herringbone, chevron, or staggered pattern.
🔹 Stylish Combos:
✔ Hardwood planks fading into tiles
✔ Stone tile gradually mixing into wood
✔ Geometric cuts creating a modern design
💡 Pro Tip: This technique takes precision—hire a pro or take your time with DIY installation!
![]()
Photo Credit: Corner Stone Remodeling
5. Carpet-to-Hard Surface Transitions
🔹 Best For: Bedrooms, hallways, and living rooms.
🔹 How It Works: Use a carpet edge gripper or a flush metal transition to secure the carpet while keeping a neat appearance.
🔹 Popular Choices:
✔ Tuck-in method (carpet tucks under hardwood edge)
✔ Seamless vinyl-to-carpet reducers
✔ Decorative transition strips for extra style
💡 Pro Tip: If using carpet in high-traffic areas, choose a durable, low-pile option to prevent fraying at the transition.

Photo Credit: Pinterest
Final Thoughts: Choosing the Right Transition for Your Floors
Your flooring transition should be functional and stylish—enhancing the flow of your space while keeping materials secure. Here’s a quick guide:
✅ For different hard floors: Use T-molding or flush transitions
✅ For uneven flooring heights: Choose reducers or threshold strips
✅ For a luxury look: Try a border or patterned blend
✅ For carpet transitions: Use tack strips or flush edges
Not sure which option works best for your space? Visit Floor Authority in Myrtle Beach for expert advice and the best flooring solutions!